


There was a time where accessing the device webcam was only possible using Flash and obscure plugins. Enter WebRTC. Let's take a look on how to capture a still photo using the webcam and save it using XPages.
WebRTC
WebRTC (Web Real-Time Communication) is an API built-in to modern browsers which allows access to the device webcam to capture video and optionally stream audio and/or video. WebRTC is supported on desktop and mobile in Google Chrome, Safari, Firefox, Opera and Microsoft Edge.
The WebRTC API only works over HTTPS so you'll need to have your XPages application on a domino server with HTTPS available.
Webcam-easy.js
The WebRTC API is pretty straightforward and well documented. There's plenty of good guides available like this one from the Mozilla MDN docs, so you can definitely work with the WebRTC API directly, however I recommend you use a Javascript library like webcam-easy to quickly get started as most of the heavy lilting is already done for you. Webcam-easy also provides some useful functions to switch to front and back camera on mobile, and start/stop the webcam etc.
Add library resource
You can use webcam-easy directly from a CDN or download the webcam-easy.min.js and add to your files resources.
<xp:this.resources>
    <xp:script src="https://unpkg.com/webcam-easy/dist/webcam-easy.min.js"
       clientSide="true">
    </xp:script>
</xp:this.resources>
Add the HTML elements
Next we need to add the required HTML elements.
- webcam video element
- canvas element for capture picture
- optional audio element for the snap sound when photo is taken
<xp:panel tagName="video">
    <xp:this.attrs>
        <xp:attr name="autoplay" value="autoplay"
           minimized="true">
        </xp:attr>
        <xp:attr name="playsinline" value="playsinline"
           minimized="true">
        </xp:attr>
        <xp:attr value="webcam" name="id"></xp:attr>
        <xp:attr name="width" value="640"></xp:attr>
        <xp:attr name="height" value="480"></xp:attr>
    </xp:this.attrs>
</xp:panel>

<canvas id="canvas" class="canvas-image d-none"></canvas>
<audio id="snapSound" src="audio/snap.wav" preload="auto"></audio>
Add hidden field for photo
We'll also going to need a hidden field to store the captured still-photo from the webcam. The photo will be encoded as a data URI (more on that later on).
<xp:inputHidden id="inputHidden1"
   value="#{viewScope.photo}">
</xp:inputHidden>
Initialise webcam
Here we initialise and start the webcam.
<xp:scriptBlock id="scriptBlock1">
    <xp:this.value><![CDATA[// init webcam
    var webcamElement = document.getElementById('webcam');
    var canvasElement = document.getElementById('canvas');
    var snapSoundElement = document.getElementById('snapSound');

    var webcam = new Webcam(webcamElement, 'user', canvasElement, snapSoundElement);

    webcam.start()
        .then(function() {
            console.log("Camera started");
    });

    function takePhoto() {
        var picture = webcam.snap();
        console.log("Photo taken");
        XSP.getElementById("#{id:inputHidden1}").value = picture;
    }]]></xp:this.value>
</xp:scriptBlock>
That should now initialise the webcam and prompt for permission to access it.
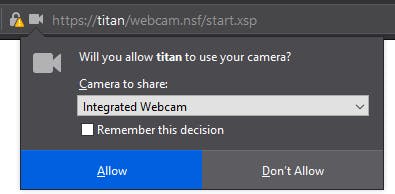
Once this is allowed, you should see a live video feed on the page.
Next, let's add a button to actually take the photo.
<xp:button value="Take Photo" id="button1">
    <xp:eventHandler event="onclick" submit="false">
        <xp:this.script>
            <![CDATA[takePhoto();]]>
        </xp:this.script>
    </xp:eventHandler>
</xp:button>
And that's it! Now that we have taken the photo, we need to get hold of it from the hidden field. The webcam.snap() function takes the photo and returns a data URI with the image in PNG format. What exactly is a data URI then?
A data URI (Uniform Resource Identifier) is scheme that allows data (including binary data such as images) to be Base64 encoded as a string and added to HTML and CSS. Browsers are then able to decode and display the embedded files.
A data URI image - for example a small red dot - looks like so:
<img src="data:image/png;base64,iVBORw0KGgoAAA
ANSUhEUgAAAAUAAAAFCAYAAACNbyblAAAAHElEQVQI12P4
//8/w38GIAXDIBKE0DHxgljNBAAO9TXL0Y4OHwAAAABJRU
5ErkJggg==" alt="Red dot" />
Now, let's extend the button we added earlier and add some SSJS to Base64 decode the image and save it on the server's local file system.
//get base64 of the photo
var str = viewScope.photo;

// convert base64 to binary
var imagedata = new java.util.Base64.getDecoder().decode(str.substring(str.indexOf(",") + 1));

// read binary as image
bufferedImage = new javax.imageio.ImageIO.read(new java.io.ByteArrayInputStream(imagedata));

// save image as file
javax.imageio.ImageIO.write(bufferedImage, "png", new java.io.File("c:\\temp\\webcam.png"));
Here we're making use of the java java.util.Base64 classes to decode the image and javax.imageio classes to save the image as a PNG file on the server. In this example, I'm saving the image on the c:\temp\ folder on the server.
Conclusion
In this tutorial, we used the webcam-easy.js library to quickly bootstrap access to the webcam, take a still photo and save the image to the domino server. Since WebRTC works on all modern browsers (including Safari on iOS and Chrome on Android devices) the possibilities are endless.
Further reading
Happy coding!